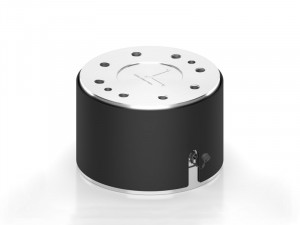
3 axis force sensor - ± 30 kN to ± 120kN - Ø125 mm x 90 mm
- Fx: 30 kN - Fy: 30 kN - Fz: 120 kN
- Traction and compression force
- Construction: Stainless steel
- Non-linearity: 0.2 % PE
- Operating temperature: -10°C to 85°C
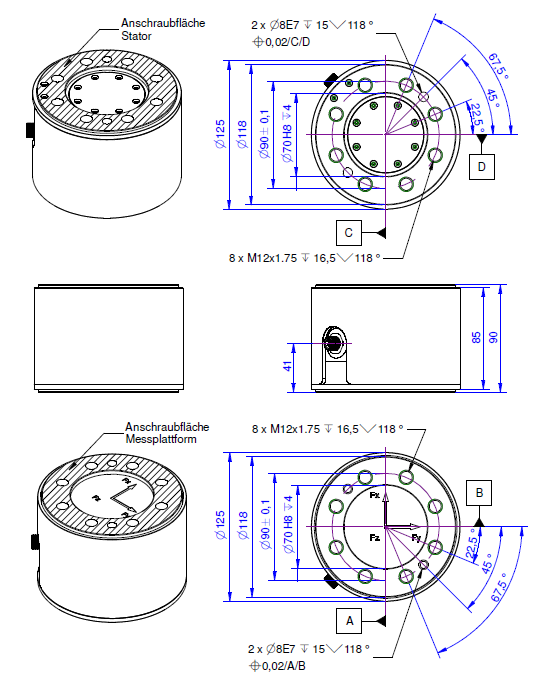
- Force transmission: 8 x M12x1.75 threads
- Size: 125 mm x 90 mm
- Output: Integrated connector
Introduction
The K3A125 sensor is designed to measure forces in the three components Fx, Fy, Fz. With a cylindrical profile and reduced dimensions, this 3-axis sensor can be easily installed on machine tools, robot arms, and test benches. The mounting is done by 8 M12x1.75 threads and centering pins. Output connector MP11 24 pins. The measuring ranges in x and y are 30kN, and 120kN in z.
The accuracy is about 0.2% of the measurement range, thanks to the temperature compensation of the calibration over the range -10 to 70°C, and the compensation of crosstalks. The overload capacity is 150% (i.e. a maximum allowable overload of 50% of the measuring range). The torque limit is 6000 Nm, and the maximum allowable bending moment is 2000 Nm.
Each transducer is delivered with a factory calibration certificate. Calibration to specific measuring ranges is possible (optional), as well as ISO-17025 calibration.
Packaging, Acquisition
The acquisition of the raw measurement signals is done with :
- a PC or PLC acquisition system equipped with a strain gage bridge input card
- or via a conditioning module for strain gage bridge with analog or digital output, then a PC or a standard acquisition system.
PM Instrumentation recommends the GSV series of digital interface conditioning modules for their ease of use and accuracy:
- the GSV-4USB (Conditioner / acquisition module, 4 analog inputs) or its Bluetooth version GSV-4BT M12, which can be optionally equipped with a data logger
- the GSV-8DS (High performance module, 8 analog inputs)
- the GSV-6LTE, equipped with a data logger and wireless connectivity
The GSV-1A4 conditioner is equivalent to the GSV-4USB, with 4 analog outputs instead of one serial output.
A visualization and acquisition software is included with these modules (GSV-multi). Dll and VI files are also provided for the development of an application under Labview or in C / Visual Studio / C++ / .net
Applications
The K3A125 is recommended for:
- Robotics testing
- Machine tool instrumentation
- Monitoring of production machines
- Medical equipment
- Test benches
- Type
- tbd
- Measuring Range
- 60kN , 120kN
- Number of Axis
- 3 Axis
- Precision (max error)
- 0.5 %
- Nonlinearity (% FS)
- ± 0.2 %
- Operating temperature range
- -10 à 85 °C
- Zero Balance
- 0.01 %PE/°C
- Sensibilité du gain
- 0.01 %/°C
- Tension d'alimentation
- 10 Vcc
- Measurement direction
- Traction & Compress.
- Surcharge
- 150 %PE
- Housing
- Steel
- Measuring Range (Force)
- 100 - 250 kN
- Transducer Series
- K3A
- Application
- High Accuracy, Robotics

- Calibration option (with provision of a calibration certificate)
- Cabling service - custom cable (protection and cable length)
- Conditioners (GSV 8DC SubD44 recommended)
- Cables and connectors (MP11/24p/f-SubD44/m recommended)
Produits associés
K3D160 - 3 axes - IP67 - 2 kN à 50 kN
K3D300 - 3 axes - IP67 - 50 à 200 kN
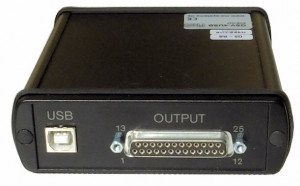
GSV-4USB


